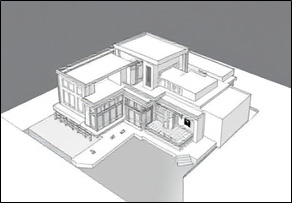
Revit importer delivers flexible workflows in SketchUp
The Revit Importer plugin helps to import the design models from Revit to SketchUp software. The users are able to convert the Revit model to the SketchUp model with just a single click by using this SketchUp extension. In addition, the Revit Importer plugin also helps to accelerate the Revit-to-SketchUp workflow of users within just a few minutes.
This plugin has compatibility with different SketchUp versions, including SketchUp 2023, SketchUp 2024, and SketchUp 2025. The Revit Importer has been supported by Windows. There are numerous supporting languages for the Revit Importer plugin, for example, English, German, French, Spanish, Italian, Brazilian Portuguese, Polish, Russian, Korean, Japanese, Traditional Chinese, Simplified Chinese, and Swedish.
Design features of the Revit importer plugin for SketchUp software
There are numerous features offered by the Revit Importer plugin, which are as follows:
➢ The Revit Importer offers an option for importing metadata from Revit software.
➢ The Revit Importer plugin has the ability to select and import the Revit 3D view.
➢ The .rvt files can also be imported by the Revit Importer plugin from the local drive of the user.
➢ With the help of the Revit Importer, users can convert the Revit families into SketchUp components.
➢ The Revit Importer also helps to translate the Revit levels into the SketchUp section planes, and it has been grouped under the single “Level” component in the Outliner.
➢ By using the Revit Importer, the Revit design materials can also be converted into SketchUp materials, which retain the original Revit name and the “Consistent Colours” option.
➢ The Revit Importer plugin also helps to preserve the Revit metadata and all other design elements.
➢ The Revit files can also be exported to IFC with the help of the Revit Importer plugin.
Key functionalities of the Revit Importer plugin for SketchUp software
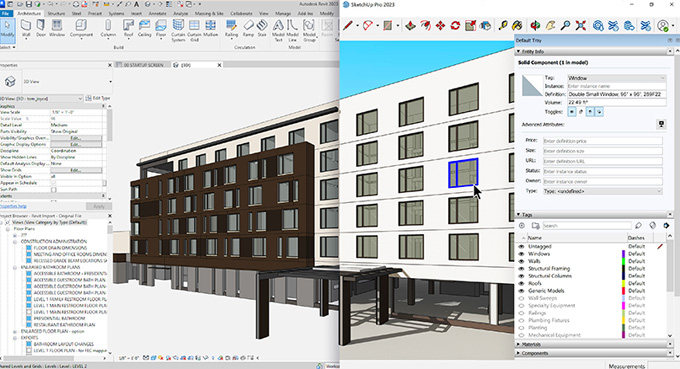
The Revit Importer plugin helps to incorporate the .rvt file into the SketchUp design model of the users, which enables the SketchUp software to automatically create the following:
➢ SketchUp Sections: The SketchUp sections have been created from the Revit levels with the help of the Revit Importer.
➢ SketchUp Tags: The Revit Importer enables all the Revit families to receive tags after the equivalent Revit categories.
➢ SketchUp Components: The Revit Importer plugin also helps to convert all Revit families into design components and helps to convert the Revit objects into identical components. In addition, the Revit Importer also names those components by using the name of the Revit family or family type.
➢ SketchUp Materials: With the help of the Revit Importer, the Revit materials have become the SketchUp materials. In this case, the transparent materials have also been supported by this plugin.
➢ Data Preservation: The Revit Importer helps to preserve critical data that has been embedded in .rvt files, which can identify the IFC classes more accurately.
➢ 3D Views Dialog: The Revit Importer includes a 3D views dialog, which helps to display all available 3D views in the .rvt file.
➢ Outliner-Based Components: The users are able to use the hierarchy of levels in their .rvt file, which helps to create the design components in Outliner.
Discuss the import options offered by the Revit Importer plugin
The Revit Importer offers several import options, which help to bring the Revit projects into the SketchUp software. The users are able to import the Revit projects from the local drive or from Trimble Connect into the SketchUp software.
1. In the case of the .rvt file that has been saved locally, the file can be imported into the SketchUp software by clicking on the File option and then clicking on the Import button. In this context, the users are able to find the Revit file in the File Manager, which has been listed as an option in the list of supported files. The user has to select one file and click the import button.
2. In the case of the .rvt file that has been uploaded to the Trimble Connect, the user has to click on the File option, then go to the Trimble Connect option, and after that, they have to click on the Import File button or Import Visual Reference to import the file. In the case of having the Trimble Connect toolbar, the users are able to use Import File or Import Reference Model.
How to maximise the functionalities of the Revit Importer plugin
The functionalities of the Revit Importer can be maximised by following several steps:
Selecting the right file format
For the quick 3D imports, the SKP files are appropriate, which helps to ensure smoother integration.
Selecting the right file format
For the quick 3D imports, the SKP files are appropriate, which helps to ensure smoother integration.
Matching units and scales
It needs to be ensured that the unit system will match the source file, which helps to prevent scaling issues.
To get online demonstration, watch the following video tutorial.
Video Source: SketchUp
Download Plugin Revit Importer
Cleaning up the imported models
The users have to clean up the unnecessary parts of their SketchUp models before importing them, which helps to speed up the importing process.
Controlling layers and visibility
The visibility settings of the Revit files can also be adjusted by the users after importing, which helps to improve the design workflow and helps to keep the file organised.
Gallery
Feel free to contact us for BIM requirements. One of our representative will respond you within 24 Hours. Send us your projects requirement today and grow your project.
Explore More !