Advanced MEP Modeling in BIM: Mastering Techniques for Revit
Building Information Modeling (BIM) has revolutionized the construction industry, offering unparalleled collaboration and efficiency. Among the various disciplines integrated into BIM, Mechanical, Electrical, and Plumbing (MEP) systems are crucial for the functionality and comfort of buildings. Revit, a leading BIM software, provides powerful tools for MEP modeling.
Understanding MEP Systems in Revit
Before diving into advanced techniques, it’s essential to grasp the basics of MEP systems in Revit. Revit MEP offers specialized tools for modeling mechanical, electrical, and plumbing systems, enabling accurate design, analysis, and documentation. Key features include:
1. Mechanical Systems: HVAC systems, ductwork, and piping.
2. Electrical Systems: Power distribution, lighting, and communication systems.
3. Plumbing Systems: Water supply, drainage, and gas piping.
Leveraging Revit Families for MEP
Revit families are the building blocks of Revit models, allowing for customizable and reusable components. Advanced MEP modeling often involves creating and modifying families to meet specific project requirements.
Custom MEP Families
Creating custom families tailored to your project ensures precision and efficiency. Here’s how to get started:
1. Identify the Need: Determine the specific components required for your MEP system.
2. Create the Family: Use the Family Editor to design the component, ensuring correct dimensions and parameters.
3. Parameterization: Add parameters to control the family’s behavior and appearance, enhancing flexibility and reusability.
4. Testing: Place the family in a sample project to test its functionality and compatibility.
Nested Families
Nested families involve placing one family inside another, providing advanced control and reducing redundancy. For instance, a complex HVAC unit can consist of nested families for individual components like fans, coils, and filters. This technique streamlines updates and ensures consistency across the model.
Using Dynamo for Advanced Automation
Dynamo is a visual programming tool integrated with Revit, allowing for advanced automation and customization. Leveraging Dynamo scripts can significantly enhance your MEP modeling workflow.
Common Dynamo Applications for MEP
1. Automated Routing: Create scripts to automatically route ducts, pipes, and conduits, saving time and reducing errors.
2. Parameter Management: Use Dynamo to manage and manipulate parameters across multiple elements, ensuring consistency and accuracy.
3. Data Extraction and Analysis: Extract data from your Revit model for analysis and reporting, improving decision-making and project management.
Example: Automated Duct Routing
Here’s a simple Dynamo script example for automated duct routing:
1. Create the Script: Open Dynamo and create a new script.
2. Define Inputs: Select the start and end points for the duct.
3. Generate Path: Use Dynamo nodes to generate the shortest path between the points, considering obstacles and constraints.
4. Create Duct: Place the duct along the generated path, applying the necessary parameters.
By automating repetitive tasks, Dynamo scripts enhance productivity and accuracy in MEP modeling.
Utilizing Revit’s Analytical Tools
Revit offers powerful analytical tools for MEP systems, enabling performance analysis and optimization.
Mechanical Analysis
1. HVAC Load Calculation: Use Revit’s built-in tools to calculate heating and cooling loads, ensuring optimal HVAC system design.
2. Energy Analysis: Perform energy simulations to evaluate the building’s performance and identify opportunities for improvement.
Electrical Analysis
1. Circuit Analysis: Analyze electrical circuits to ensure proper load distribution and identify potential issues.
2. Lighting Analysis: Use Revit’s lighting analysis tools to evaluate lighting levels and optimize fixture placement.
Plumbing Analysis
1. Flow Analysis: Perform flow analysis to ensure adequate water supply and drainage.
2. Pressure Loss Calculation: Calculate pressure losses in piping systems to optimize design and ensure efficient operation.
By leveraging these analytical tools, you can optimize your MEP systems for performance, efficiency, and sustainability.
5. Collaboration and Coordination
Effective collaboration and coordination are vital for successful MEP modeling in BIM. Revit provides various tools to facilitate communication and collaboration among project stakeholders.
Worksharing
Revit’s worksharing feature allows multiple users to work on the same project simultaneously, enhancing collaboration and efficiency.
1. Central Model: Create a central model that serves as the primary project file.
2. Local Models: Each user works on a local copy, syncing changes with the central model.
3. Worksets: Divide the project into worksets, enabling users to work on specific areas or systems independently.
Clash Detection
Clash detection identifies conflicts between different building systems, reducing errors and rework.
1. Interference Check: Use Revit’s interference check tool to identify clashes between MEP systems and other building elements.
2. Navisworks Integration: Integrate Revit with Navisworks for advanced clash detection and coordination, improving project accuracy and efficiency.
6. Advanced Visualization Techniques
Advanced visualization techniques in Revit enhance the understanding and presentation of MEP systems.
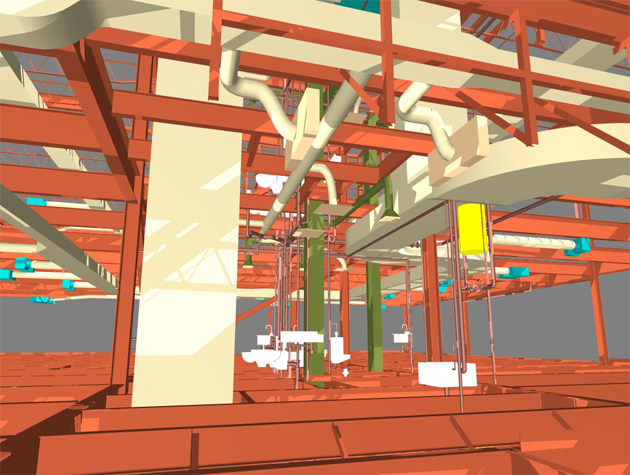
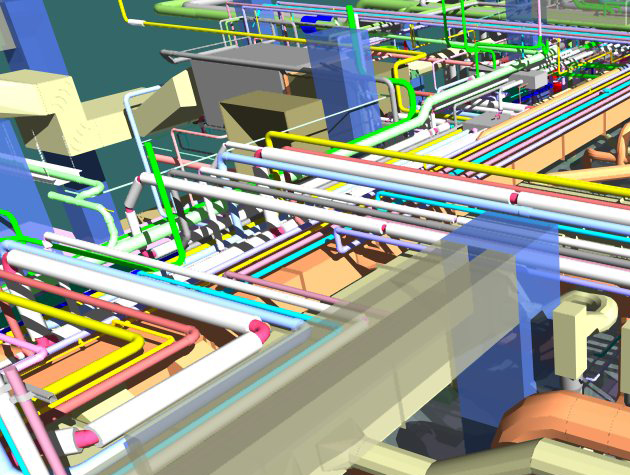
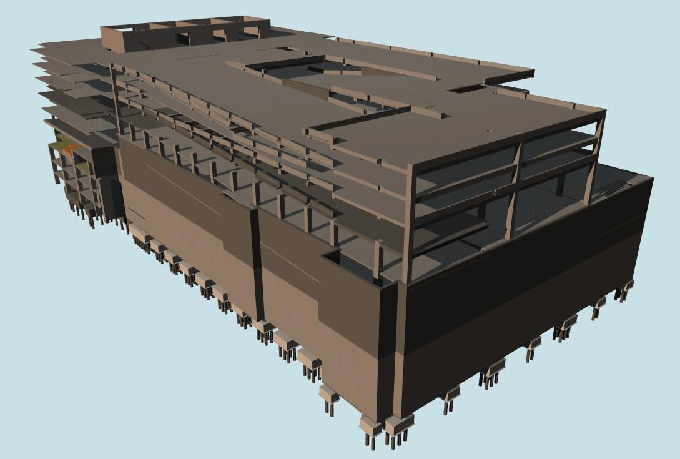
3D Views and Sections
1. 3D Views: Create detailed 3D views of MEP systems, providing a comprehensive understanding of their layout and interactions.
2. Sections: Use section views to examine specific areas in detail, identifying potential issues and improving design accuracy.
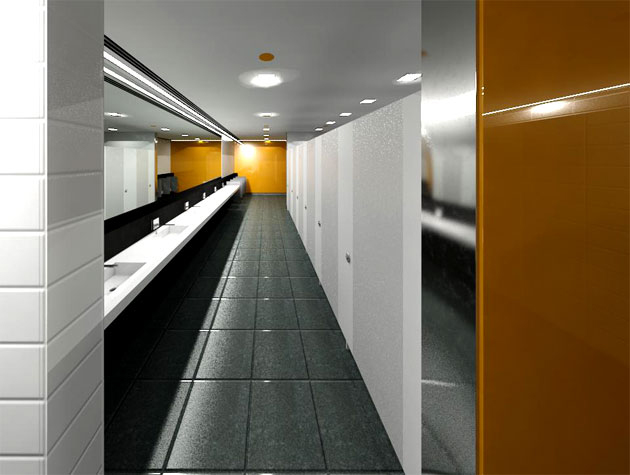
Rendering
1. Realistic Rendering: Use Revit’s rendering tools to create realistic visualizations of MEP systems, aiding in presentations and client communications.
2. Virtual Reality (VR): Leverage VR technology to create immersive experiences, allowing stakeholders to explore and interact with MEP systems in a virtual environment.
Example: Detailed 3D View
1. Create 3D View: Select the desired area and create a 3D view in Revit.
2. Adjust Visibility: Customize the view by adjusting visibility settings, hiding unnecessary elements, and highlighting key components.
3. Enhance with Annotations: Add annotations and dimensions to the view, providing additional context and information.
To get online demonstration, watch the following video tutorial.
Video Source: Autodesk Building Solutions
By utilizing advanced visualization techniques, you can effectively communicate complex MEP designs to clients and stakeholders.
Conclusion
Advanced MEP modeling in Revit requires a deep understanding of the software’s capabilities and the ability to leverage its tools effectively. By mastering custom families, utilizing Dynamo for automation, performing detailed analyses, collaborating efficiently, and employing advanced visualization techniques, you can enhance your MEP modeling skills and deliver high-quality, efficient, and sustainable building systems. Embrace these advanced techniques to stay ahead in the ever-evolving world of BIM and MEP modelling.

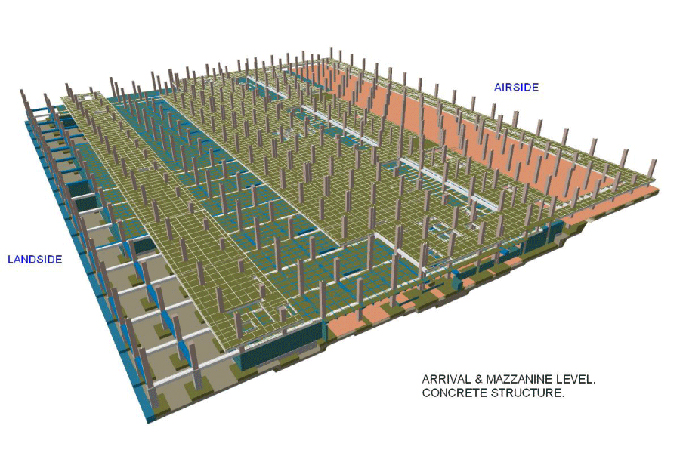
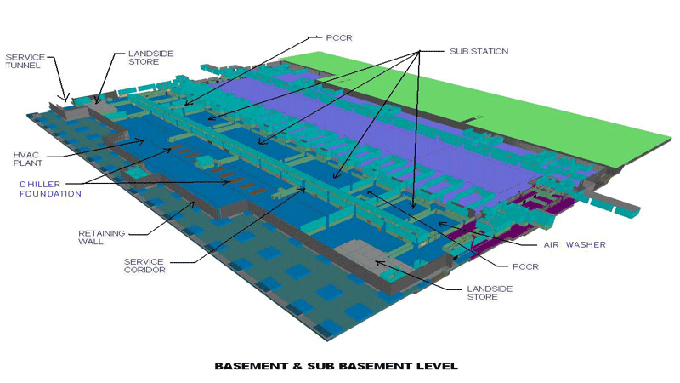
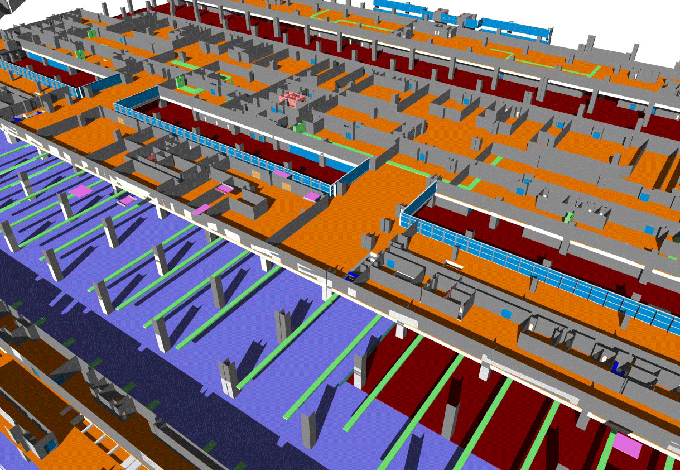
Gallery
Feel free to contact us for BIM requirements. One of our representative will respond you within 24 Hours. Send us your projects requirement today and grow your project.
Explore More !