Download Roof Framing Extensions for Revit
The Revit software offers several roof framing extensions, which help to automate the modelling of the roof structure in the Autodesk Revit software. The roof framing extensions of the Revit software are as follows:

Wall framing extension
The wall framing extension allows the framing select walls in the Autodesk Revit software. The wall framing extension helps to import walls, can recognise the openings, and helps to present those in the 2D or 3D viewer.
With the help of the wall framing extension, the walls of the roof structure can be individually framed along with available framing parameters, like plates, connections, blocking, studs, cripples studs, headers or sills. The wall framing extension uses the frame families, which helps to customise the framing of the roof structure.
Roof trusses extension
The roof truss extension helps to define the truss system for the roof design models. With the help of the roof trusses extension, the users are able to define the parameters of the roof structural elements, including ridge trusses, wall plates and roof ends. On the basis of the families available in the roof trusses extension, the roof structural elements can be generated.
Rafter framing extension
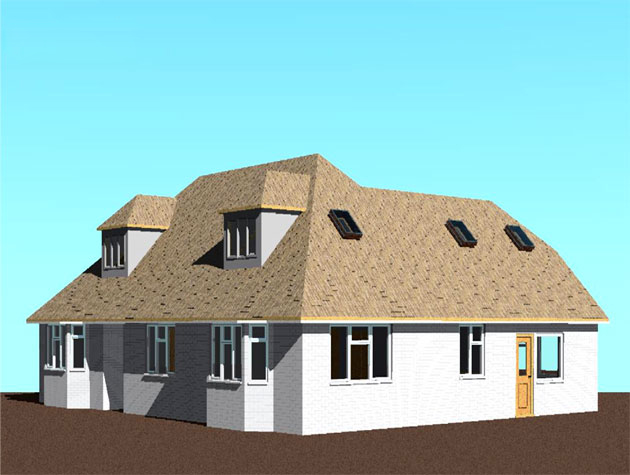
The rafter framing system enables the creation of different types of A-frame roof models. The rafter framing extension helps to generate a timber roof structure, which can be exported to the Autodesk Robot Structural Analysis software and helps to perform the structural analysis process and design tasks. The families available in the rafter framing extension help to generate the roof structural elements of the roof design model.
Understanding the key design features of the Roof Framing Extensions for the Revit software
Helps to detect openings
The roof framing extensions allow the users to differentiate the openings, the type of the wall and connections through the Revit project, while framing around auto-generated openings on the basis of the pre-defined user criteria.
Multilayering features
The Revit software also has multilayer capabilities, which help to accommodate the multiple sheathing, furring and structural layers of walls.
Full automation feature
The roof framing extensions of the Revit software help to simplify the generation of the rafter and truss roof systems, which can be exported directly to the CNC machinery. The assembly information can also be sent to the nailing bridges and panel machines by the roof framing extensions for the ultimate in Revit software to shop floor manufacturing automation.
Offering engineering capabilities
The roof framing extension also helps to size and engineer the floor systems and beams. By using the roof framing extensions, the users are able to check and analyse the complete floor systems of the roof structure.
Process of creating roof models by using roof framing extensions of the Revit software
By using the roof framing extensions, the roof framing structure has been developed, and it has been done by following several basic concepts, which are:
Creating roof trusses
To create a roof frame, the roof trusses are the most popular option. The roof trusses help to define the form of the roof and ceiling, which helps to provide for the roof structure. In this context, the roof trusses are pre-engineered in a factory using lightweight materials and are shipped easily to the construction site. While adding the roof truss to the underside of the roof, the user has to go to the Structure tab and select the Truss tool. The user has to open the Structural Trusses folder in the UK library and can select the gable truss, flat truss, 6-panel and simple W truss.
In the next step, the user has to place a simple W truss in the plan view. The user has to follow the prompts that appear in the bottom left corner of the Revit interface. After that, the user has to switch to a section view and has to adjust the position of the truss as per the requirement. Then, the user has to change the detail level to fine on the view control bar, which helps to see the truss properly.
Creating braces
In the framing elevation view, the users can add the braces to the beams and columns. While hooked up to the beam, the user can specify the distance, attachment or quantitative relation.
Download Wood Framing Extension for Revit
The user can also set the end of the document part as per the design requirement relative to the gap or ratio value. The user can also move, copy, array, and rotate the braces out of the vertical plane. The brace tool has been used to add the diagonal members that have been connected to the beams and columns.
Creating a beam system
The beam system has been created and used to draw each beam of the roof structure independently, and can also copy a beam multiple times. The beam system helps to draw the repeated beams, can specify the type of the beams and other parameters that are required to build the set. At the end of the design, a set of beams has been generated as a group in a way that if changes are required, it has been done automatically propagated to all the beams.

Gallery
Feel free to contact us for BIM requirements. One of our representative will respond you within 24 Hours. Send us your projects requirement today and grow your project.
Explore More !