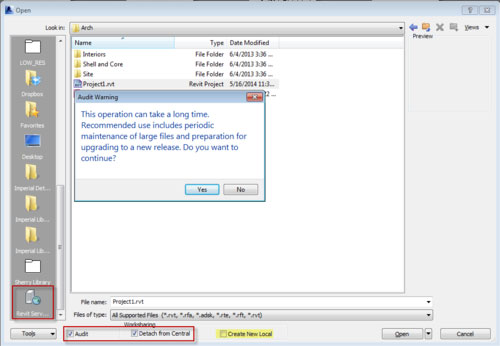
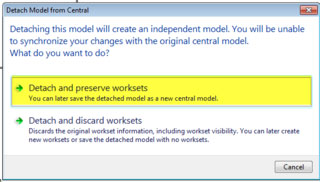
To move Revit Server projects to a new host the user needs to have physically save them to the new host through Revit. This is also the perfect time to clean up the file before vigorously using the new central file in production. You can access the link to file preservation here.
For those of you using Revit Server, it is still important to maintain the central file. Keeping the central file healthy is critical to keeping the project running smoothly and to avoid causing file corruption. Below are best practices that need to be done routinely on the central file to keep it clean. Routinely is going to depend on how active the project is. The more active the project is, the more often it should be maintained. This should be done on all models since links impact model performance as well.
IMAGINiT Technologies, A Rand Worldwide Company (OTCBB:RWWI), is the world's largest provider of enterprise solutions to the engineering community, has brought this one.
Make sure that the entry for the new Host is in the rsn.ini file and create the project and folder structure through the Revit Server Administrator (or Clarity if you are using that).
Process:


Note: If you select Options you will notice that Make this a Central Model after save and Compact are greyed out and pre-checked.
Check everything that can be checked including compact if you like, although the process of saving the file to a new location will already do this. You can add a comment if you like; this shows up in History under comments.
After the save is complete, close the project.
This process will need to be done for all models in the project.
This Step is CRITICAL: Before having users create new local files make sure they delete or archive/rename their old local files and their back up folder.
Once all of the models are saved to the new host have one user open a local file and repath the links. Sync with central and relinquish. Now all users should be able to pull new local files (See * comment above) from the new host.
Blog created by : IMAGINiT Technologies Team
Ref: www.blogs.rand.com